Open data portal publishing guide
Last updated: 8/05/2023
Contents
Registering for a publishing account
Adding a Dataset and Resource/s
Adding a Dataset to a Group or Groups (formerly Categories)
Starting on data.qld.gov.au
Use an optimised browser
The Open data portal is optimised for modern browsers. e.g. Google Chrome, Firefox, Opera or Safari.
Training
Publishers should familiarise themselves with the publishing process in the open data portal testing and training environment found here: https://training.data.qld.gov.au.
For publishing access to the open data portal testing and training environment, send an email to online@qld.gov.au requesting a username and password. The publishing instructions in this document are also appropriate for this environment.
Registering for a publishing account
To create an account as a publisher, go to the self-publishing account request form and complete the form. If you are not likely to publish to the Publications portal, please only tick the ‘Data portal’ check box. Before being granted access to publish, you must have appropriate permission from your organisational entity (Queensland Government Department, Agency or Statutory Body) to publish on their behalf.
Your account will be set up by default as an Editor*. If you require an Administrator** role, please ensure this request is made through the senior open data representative in your Department or Agency (most agencies and legislative bodies that publish under the stewardship of a Department do not require Administrators).
* EDITORS are able to add, edit and delete datasets and resources associated with their organisation.
** ADMINISTRATORS possess the access privileges of Editors and can also manage users within their organisation, update organisation details and manage data requests and comments for their organisation.
Log in
If you already have an account, in the Open data portal:
- Click Log in near the top right corner of the page or go to https://data.qld.gov.au/user/login.

- In the provided fields, type your Username (not your email address) and Password then click the Login button.
- If you have forgotten your username please email online@qld.gov.au.
Resetting passwords
If you already have an account but have forgotten your password:
- In the Open data portal, click Log in near the top right corner of the page or go to https://data.qld.gov.au/user/login.
- Please use the Forgot your password? button on the left of the page, enter your Username then click the Request Reset button.

Passwords should be a minimum of 10 characters in length and contain (at least) one of each of the following: upper case letter, lower case letter, numeral and a symbol such as: @#$%^&.
Adding a Dataset and Resource/s
A dataset is the overall container which holds a single resource or a group of resources relating to a given topic.
Fields marked with a red asterisk (*) are mandatory.
- Log in with an account with publishing privileges
- Click Data on the (top menu) to display a list of existing datasets

- Click Add Dataset

- On the first page you’ll be asked to complete fields to describe your data (this information is the metadata).
- Title: name of the dataset (this is the short name of the topic relevant to the data to be added).
- Enter a Description of your dataset (this is the explanation of the topic or overview of the data to be added)
NOTE: You can use markdown formatting in your description to link to other websites for more information. - Tags: some keywords (or tags) that describe your data. These are key phrases or words to improve searching (e.g. ‘Gaming forms’, ‘Gaming licence application’, ‘Gaming machine application’). This uses type-ahead to suggest tags that have been used previously. Start typing your intended tag and make a selection. To add another tag, start typing again and repeat.
- License: select a licence from the drop-down menu. Most Queensland Government resources will be ‘Creative Commons Attribution’, but some resources may require a different licence type. For example, technical documents that we need to protect IP will be CC-NC. For descriptions of licence types visit the Creative Commons website.
- Organisation: In most cases, this will be filled with your organisation as a default. Most users can only publish to a single organisation although drop-down box is provided to select from multiple choices if relevant.
- Visibility: whether the dataset will be viewable to all users once complete. The default is private, as such it will only be visible to people from your organisation that are logged into the data portal. Set it to public if you want anyone to be able to view it.
- Source: Where the data contained in the dataset is taken or derived from a table or database located at, or accessible from, a web address, insert the URL in this field
- Version: Enter the version number. For a new dataset, this will generally be ‘1.0’. Where an existing dataset is updated with new data or significant details are changed, it may be appropriate to update this field to a great number in sequence.
- Email: Enter the publisher’s work email address, or, if appropriate, a group email address. This address is not exposed to public users, however, email notifications sent by the system when user comments/questions relating to this dataset are added, will be directed to the specified email address.
- Security Classification (required): The assessed security classification of the dataset.
- Used in data driven application: Where it is known by the publisher or editor that the contents of this dataset will be consumed by an application that relies upon this data, specify ‘Yes’ in this field.
- Update Frequency (required): How often the dataset is intended to be updated. e.g.: Daily, Weekly, Never.
- Next update due (conditionally required): If the update frequency is set to Monthly, Quarterly, Half-yearly or Annually, the Next update due field will appear and will auto populate with a date equal to today's date plus the respective update frequency. A user can modify this date to any future date. Next update due is not visible or required for other update frequencies. The automatically calculated values have been set to:
- Monthly = +30 days
- Quarterly = +91 days
- Half-yearly = +182 days
- Yearly = +365 days
- Contains de-identified data (required): Where the published data has been derived from data containing personal information and edited to minimise the risk of re-identification, select 'Yes' from the drop down box. Where the published data has not been derived from data containing personal information or has not been edited (e.g. publishing personal information is necessary) for de-identification purposes, select 'No' from the drop down box.
- Default Data Schema (if desired): A default data schema can be specified which will be applied to all new or edited resources in the dataset. A schema can be provided using Upload to provide a JSON file containing the schema, using Link to link to an external source containing JSON code for the schema or using the JSON option and adding the JSON code directly to the text box provided.
- If applied at the Dataset level all future Resources uploaded will validate against this schema. If the ‘Contains De-Identified Data’ field is set to YES the uploaded resource does not match the default schema an Error will be produced and the resource will be hidden.
- Click the Save button
- Click Next: Add Data
- Click Upload to select a resource/file from a folder or select Link to nominate a URL location of the resource.
- Add a Name for this resource (required).
- In the Format field, start typing the file’s extension and select from the dropdown list (format or file type).
- Add a Description of your new resource (required).
- If you have uploaded the resource, the Size field will then not be visible. For linked resources, add the Size of your resource in bytes.
- The default Resource visible field 'TRUE' value will generally make the resource publicly visible. See the below field explanation for the exception. If you wish to initially hide the resource from public view, select 'FALSE'.
- The Re-identification risk governance completed? field defaults to 'NO'. The selection of a 'YES' or 'NO' value leads to the following behaviour:
- Where the dataset metadata field, Contains de-identified data has a value of 'NO', selecting a Re-identification risk governance completed? value of 'NO' is the appropriate choice. Selecting 'YES' is also acceptable if a re-identification risk minimisation governance process has been completed.
- Where the dataset metadata field, Contains de-identified data has a value of 'YES', the resource WILL BE PUBLICLY HIDDEN, irrespective of the Resource visible value, unless an acknowledgement is made that a re-identification risk minimisation governance process has been completed. Make this acknowledgement by selecting a Re-identification risk governance completed? value of 'YES'.
- The Request Privacy Assessment field defaults to 'NO'
- If 'YES' is selected and the dataset Contains de-identified data field is also set to 'YES' the resource WILL BE PUBLICLY HIDDEN irrespective of the Resource visible value.
- A privacy assessment should only be requested if the Contains de-identified data field is set to 'YES'
- If desired, add a Data schema for this resource.
- Add Validation options if desired. Follow the link for further information.
- You can add additional files to the dataset by clicking Save and add another and repeating the process.
- Click the Finish button.
Each dataset must be added to at least one Group. Please refer to Adding a Dataset to a Group.
Generating a Data Schema
If you do not have a pre-existing data schema you may generate one based on an uploaded Resource
- Navigate to the chosen resource and select Manage
- Select the Data Schema tab from the top of the page
- Select Generate JSON Data Schema and the status will change to ‘Pending’. The system will now read the uploaded resource and produce a JSON Data Schema that matches the format of that resource
- After a short wait refresh the page and the status will have changed to ‘Complete’
- Select whether to apply this schema at the Dataset or Resource level
- Click Apply
Draft Datasets
A dataset may be created as a ‘draft’ only with the title appended with ‘[Draft]’. Irrespective of the Visibility selection, the draft dataset will not be discoverable through Search. It can be viewed either through the publisher’s ‘My datasets’ tab or is publicly visible through the use of the specific dataset URL. Draft datasets cannot, normally (see below*) , have resources attached.
To create a draft dataset:
- Use the normal process for Adding a dataset (but not the resource/s), completing the process after clicking the Next: Add data button
- Upon the display of the Add new resource page, exit out of that page at any time WITHOUT attempting to save the resource.
To take the dataset out of [Draft] status:
- Use the Adding Additional Resources to an Existing Dataset process, and when complete, the [Draft] status will be removed.
* If a resource has been added to a dataset but the [Draft] status remains:
- Log in to the account with publishing privileges used to create the [Draft] dataset
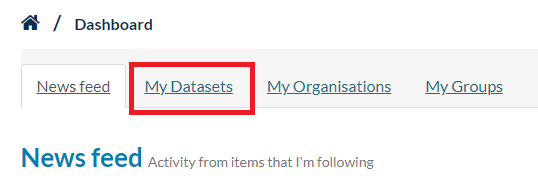
- Click on the Dashboard icon at the top right of the page

- Click on the My datasets tab
- Click to open the relevant dataset with ‘Draft’ appended to the title
- In the dataset page, click on a resource to open the resource page
- In the resource page, click on the Manage button
- Click on the Finish button at the bottom of the page and ensure the update process is complete (momentarily cycles then displays the Dataset page) before taking other action.
Adding a Dataset to a Group or Groups (formerly Categories)
NOTE: All datasets must be assigned to at least one group
- Log in with an account with publishing privileges
- Browse to the relevant dataset and select to display
- Click on the Groups tab near the top centre of the page

- Click in the drop-down field and the list of groups will display
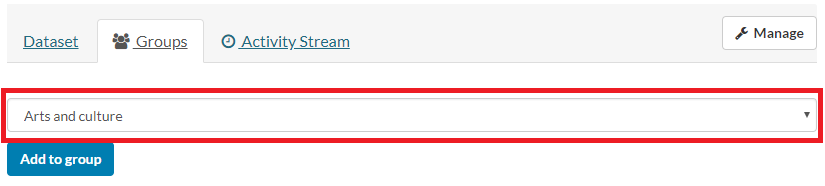
- Scroll if necessary and click on the relevant group
- Click the Add to group button (and the selected group will appear under the heading ‘Title’)
Updating an Existing Dataset
Using the steps below you can locate relevant datasets, change metadata and update or add additional resources (files) to the dataset.
Locating a Dataset
In addition to the search functionality in the home page and data pages, you may be able to locate relevant datasets for the functions contained within this guide, you can also:
- Log in with an account with publishing privileges
- Click on the Dashboard button on the top right of the page
- Click on My Datasets and select the relevant dataset.
Updating a Dataset’s Metadata
- Log in with an account with publishing privileges
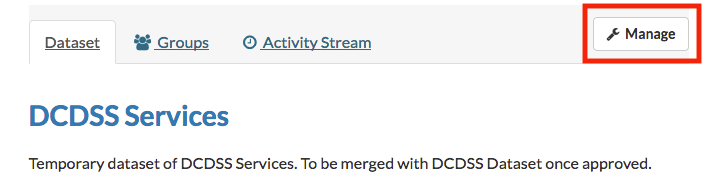
- Browse to the relevant dataset and select to display
- Click the Manage button located near top right of the page
- Edit the metadata associated with a dataset
- Fields marked with a red asterisk (*) are mandatory
see: Adding a Dataset and Resource/s (4) for guidance on the metadata fields.
- Fields marked with a red asterisk (*) are mandatory
- Once finished click the Update Dataset button at the bottom of the page.
- It is recommended that no existing datasets are deleted although the ability to do so is included should publishers wish to correct an error.
Adding Additional Resources to an Existing Dataset
- Log in with an account with publishing privileges
- Browse to the relevant dataset and select to display
- Click the Manage button located on the near top right of the page
- Click the Resources link near the top centre of the page
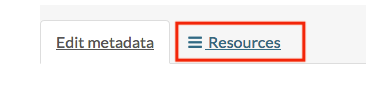
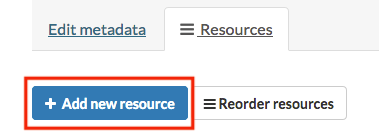
- Click the + Add new resource button
If you want API access to be automatically generated for your dataset, the data must be in CSV or Excel formats and must comply with the criteria available here: Resource formatting
- Add a Name for this resource (required).
- In the Format field, start typing the file’s extension and select from the dropdown list (format).
- Add a Description of your new resource (required).
- If you have uploaded the resource, the Size field will not then be visible. For linked resources, add the Size of your resource in bytes.
- The default Resource visible field 'TRUE' value will generally make the resource publicly visible. See the below field explanation for the exception. If you wish to hide the resource from public view, select 'FALSE'.
- The Re-identification risk governance completed? field defaults to 'NO'. The selection of a 'YES' or 'NO' value leads to the following behaviour:
- Where the dataset metadata field, Contains de-identified data has a value of 'NO', selecting a Re-identification risk governance completed? value of 'NO' is the appropriate choice. Selecting 'YES' is also acceptable if a re-identification risk minimisation governance process has been completed.
- Where the dataset metadata field, Contains de-identified data has a value of 'YES', the resource WILL BE PUBLICLY HIDDEN, irrespective of the Resource visible value, unless an acknowledgement is made that a re-identification risk minimisation governance process has been completed. Make this acknowledgement by selecting a Re-identification risk governance completed? value of 'YES'.
- The Request Privacy Assessment field defaults to 'NO'
- If 'YES' is selected and the dataset Contains de-identified data field is also set to 'YES' the resource WILL BE PUBLICLY HIDDEN irrespective of the Resource visible value.
- A privacy assessment should only be requested if the Contains de-identified data field is set to 'YES'
- If a Default data schema is applied at the dataset level. A checkbox appears allowing you to align the resource to the default data schema for validation.
- If not aligning to a Default data schema you may add a Data schema for this resource if desired.
- Add Validation options if desired. Follow the link for further information.
Updating a Resource in an Existing Dataset
- Log in with an account with publishing privileges
- Browse to the relevant dataset and select to display
- Select the relevant resource
- Click the Manage button located on the near top right of the page
- If the resource is to be changed, click the Clear button to remove the current resource URL

- Click Upload to select a resource/file from a folder or select Link to nominate a URL location of the resource.
- Nature of change to data will appear if a user uploads a new resource or modifies the URL of a resource and the dataset update frequency is set to Monthly, Quarterly, Half-yearly or Annually.
- Adding new time series data should be selected if a user is updating a resource to include the next period of data in the resource. e.g. if a dataset has a monthly update frequency and a user is adding November data to a resource that already contains July to October data. NOTE: Selecting this option will set the datasets Next update due date to today's date plus the respective update frequency.
- Editing resource with no new time series data added should be selected when changes are made to the resource that do not include updating new time series data. e.g. correcting a mistake in the data, re-formatting the file, adding a column to existing data etc.

- Additional updates can also be made to the following metadata fields:
- Add a Name for this resource (required).
- In the Format field, start typing the file’s extension and select from the dropdown list (format).
- Add a Description of your new resource (required).
- If you have uploaded the resource, the Size field will not then be visible. For linked resources, add the Size of your resource in bytes.
- Select a Resource visible value of 'TRUE' to (generally) make the resource publicly visible. See the below field explanation for the exception. If you wish to hide the resource from public view, select 'FALSE'.
- Select a Re-identification risk governance completed? value. The selection of a 'YES' or 'NO' value leads to the following behaviour:
- Where the dataset metadata field, Contains de-identified data has a value of 'NO', selecting a Re-identification risk governance completed? value of 'NO' is the appropriate choice. Selecting 'YES' is also acceptable if a re-identification risk minimisation governance process has been completed.
- Where the dataset metadata field, Contains de-identified data has a value of 'YES', the resource WILL BE PUBLICLY HIDDEN, irrespective of the Resource visible value, unless an acknowledgement is made that a re-identification risk minimisation governance process has been completed. Make this acknowledgement by selecting a Re-identification risk governance completed? value of 'YES'.
- The Request Privacy Assessment field defaults to 'NO'
- If 'YES' is selected and the dataset Contains de-identified data field is also set to 'YES' the resource WILL BE PUBLICLY HIDDEN irrespective of the Resource visible value.
- A privacy assessment should only be requested if the Contains de-identified data field is set to 'YES'
- If a Default data schema is applied at the dataset level. A checkbox appears allowing you to align the resource to the default data schema for validation.
- If not aligning to a Default data schema you may add a Data schema for this resource if desired.
- If desired, add a Data schema for this resource.
- Add Validation options if desired. Follow the link for further information.
- Click the Update Resource button.
Changing the Order in which Resources are Displayed
- Log in with an account with publishing privileges
- Browse to the relevant dataset and select to display
- Click the Manage button located on the near top right of the page
- Click the Resources tab at the top centre of the page
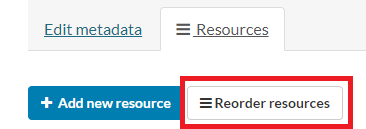
- Click the Reorder resources button
- Resources can now be reordered by dragging and dropping into a new position
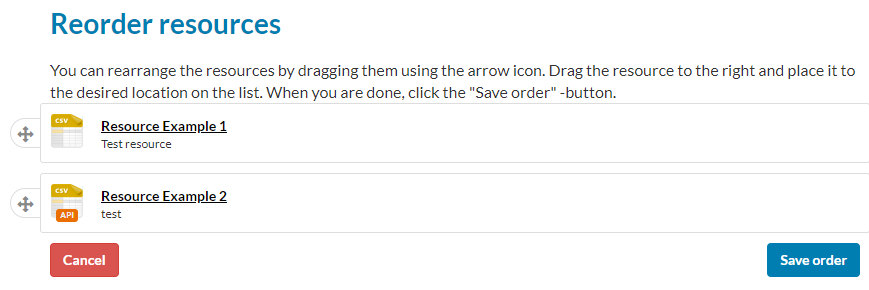
- Once finished click the Save order button
Deleting Resources from a Dataset
DO NOT USE THIS if you are planning to remove a resource and replace with an updated version. See: Updating a Resource in an Existing Dataset above. Updating a resource will mean its unique identifier will not change.
Deleting a resource will mean that it is no longer available for use.
- Log in with an account with publishing privileges
- Browse to the relevant dataset and select to display
- Select the resource that is to be deleted
- Click the Manage button located on the near top right of the page
- Click the Delete button
- Click the Confirm button
NOTE: Depending on your role, you may not have permission to delete a dataset. In this case, ask your organisation’s Administrator to delete it.
Deleting a Dataset
- Log in with an account with publishing privileges
- Browse to the relevant dataset and select to display
- Click the Manage button located on the near top right of the page
- Click the Delete button at the bottom of the page
- A pop up window will appear. Provide a reason, between 10 and 250 characters, for why the dataset is being deleted.
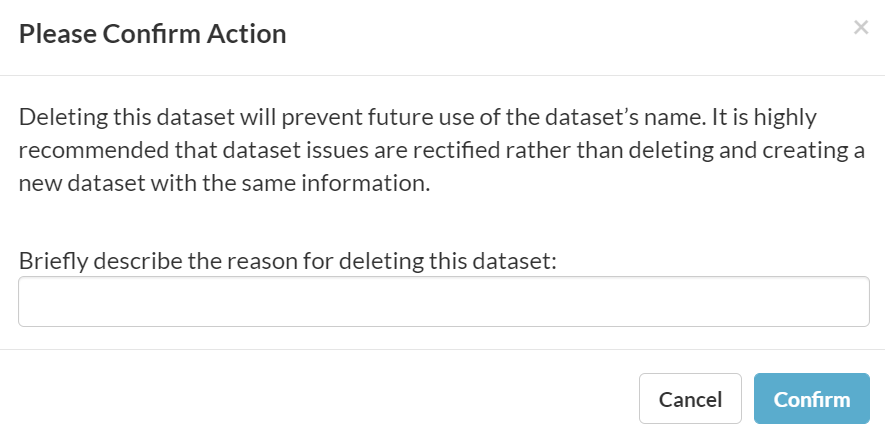
- Click confirm to delete the dataset.
NOTE: A dataset cannot be deleted while the Used in data driven application dataset metadata field is set to 'Yes'.
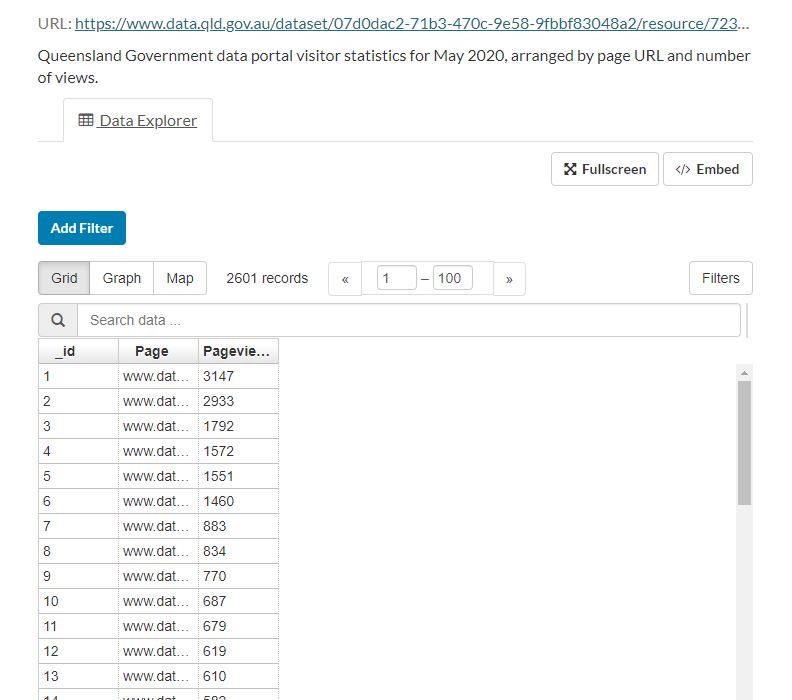
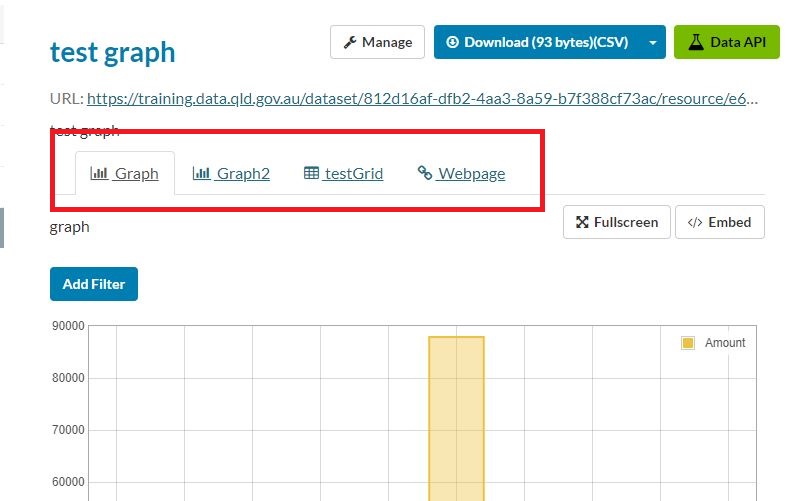
Editing the visualisations on a resource page
When a correctly formatted CSV or Excel resource is added to a dataset, the Open Data Portal will automatically upload the contents of the resource to the CKAN Datastore. This enables the resource data to be accessed by CKAN API functionality and will also display the ’Data Explorer’ visualisation by default on a resource page.
There are six different types of visualisation available and a publisher can change or add these by managing the resource. To do this:
- Log in with an account with publishing privileges
- Navigate to the relevant resource page and click the Manage button.
- Click the Views tab from the menu.

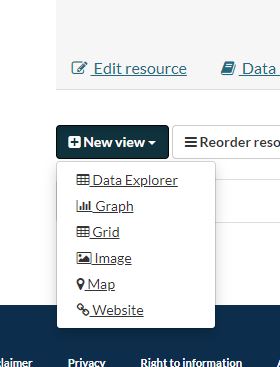
- Click the New view drop down button.
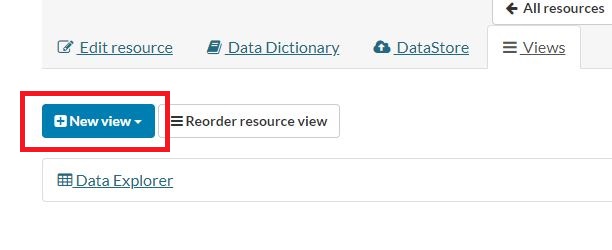
- Select the type of view you want to add. There are six in total including Data Explorer (the default visualisation), Graph, Grid, Image, Map and Website.
- Complete the Title field(mandatory), and adjust or use the fields presented which vary depending on the view type selected.
- Click Preview to view a preview of the visualisation and Add to add the visualisation to the resource page.
- To reorder visualisations, click the Reorder resource view button from the Views menu.
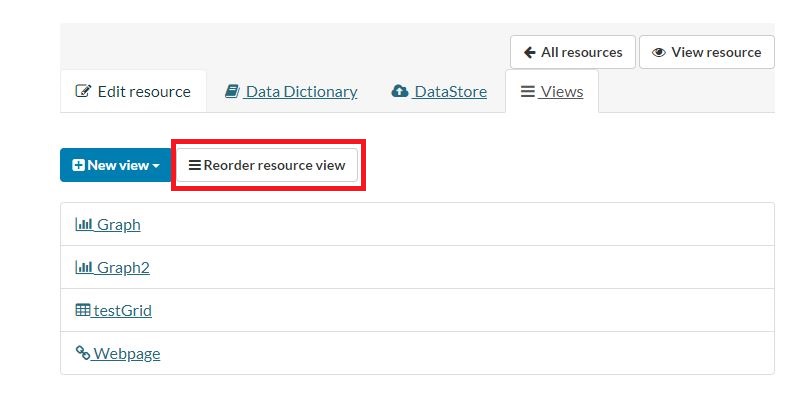
- Move the visualisations to the order you require. The top visualisation will show by default when the resource page is loaded with any additional visualisations shown in tabs.
- To delete a visualisation, select the visualisation you want to delete from the Views page and click the Delete button at the bottom left of the page.
NOTE: The Map view will display when spatial fields such as longitude, latitude or polygon data are within a column or columns in a CSV. The Webpage view is currently restricted to only show data.qld.gov.au pages.
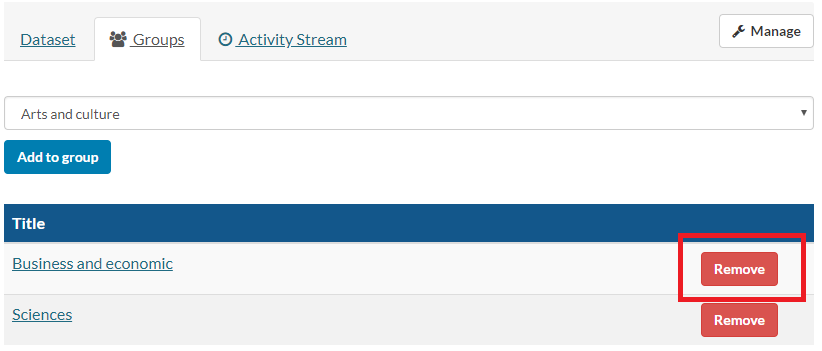
Removing a dataset from a Group or Groups (formerly Categories)
NOTE: All datasets must be assigned to at least one group
- Log in with an account with publishing privileges
- Browse to the relevant dataset and select to display
- Click on the Groups tab near the top centre of the page
- From the list under the heading ‘Title’, click the Remove button on the relevant Group row.
Changing the Dataset Visibility as a batch
As a publisher, you may choose to make a series of datasets ‘Private’ when setting their Visibility in the metadata. This method allows you to make a group of existing datasets under your organisation Public (or Private) as a batch rather than individually editing the metadata of each dataset.
- Log in with an account with publishing privileges
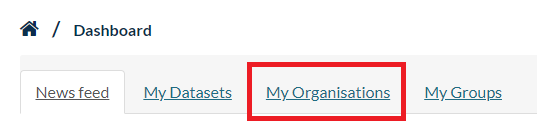
- Visit your organisation's page by clicking on the dashboard icon on the very top right of the page:
- Click the My Organisations tab near the top centre of the page and then select your organisation.
- Click the Manage button located near top right of the page

- Click the Dataset tab located on the top centre of the page

- Click in the check boxes alongside the datasets that you wish to change
- Click the Make public (or Make private) button to apply this action to the selected datasets
Updating a dataset after a machinery of government (MOG) change
When a machinery of government change takes place, the custodian organisation, dataset and resource metadata may need to be updated to appropriately reflect the change.
A data custodian should ensure that their datasets belong to the correct organisation on the Open data portal. If the dataset should be moved to a different organisation, please contact the Open Data Office team to have this change actioned.
Small changes (name, email address, description etc.) to a dataset or resource metadata can be made to reflect the machinery of government change. To do this, follow the steps in the Updating an Existing Dataset section.
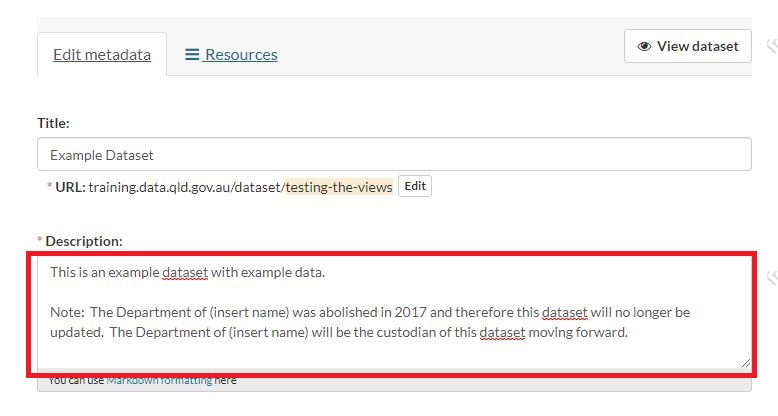
If the machinery of government change is significant to the point where a small change is inappropriate, the dataset should be modified to reflect that it will no longer be updated. This may occur when a department is abolished, two departments merge or the name and function of a department changes significantly. To do this:
- Log in with an account with publishing privileges
- Navigate to the relevant dataset page.
- Click the Manage button.
- Add a note in the description to identify what has changed and why the dataset will no longer be updated.
- Change the Update Frequency to “Not updated”

- If a new dataset is required, create one by Adding a Dataset and Resource/s.
Markdown formatting
You use markdown formatting to include links to other web pages in descriptions and to emphasise words. This can be useful if you need to refer people to a web page to explain more than can be covered in a description.
Links
Put your link text inside square brackets. Put the URL inside regular brackets, following your link text. Follow the link text guidelines in the Link Text and Calls to Action information sheet. For example:
Read the [Queensland road rules](http://real-url-would-go-here.qld.gov.au) for more information.
=
Read the Queensland road rules for more information.
WARNING: Markdown formatting will not appear where the text is displayed in a list. This includes the dataset list. Do not use link text that, if read as normal text without the context of a hyperlink, might cause confusion. For example:
Description:
This is a dataset that represents something. Historical data 2012-2017
…will display in a list as:
Here is a dataset that represents something. Historical data 2012-2017
Without the hyperlink displayed in the list, a user may not select this current data as the description suggests this is historical data. Choose your link text carefully
Italics
Place single asterisks on either side of the text to be italicised. For example:
*Felis catus* sat on the mat.
=
Felis catus sat on the mat.
Bolding
Place double asterisks on either side of the text to be bolded. For example:
You **must** register first.
=
You must register first.
Note: The more emphasis you use, the less effect it has. See the Web writing and style guide for more information.
Appendices
Appendix 1: Data in PDF format
PDF is only allowed for an explanatory resource within a dataset, e.g. Queensland Globe has 2 resources: the KML file holding the actual data, and a PDF fact sheet explaining how to use it. In this case, there should also be an accessible version of the PDF (usually an RTF file).
The actual data itself should never be contained in a PDF.
Alternatively, you can always use the code below to put proper links into descriptions to link to a report that the data was related to.
This is [an example](http://example.com/) inline link in which the link would point to ‘http://example.com/’.
The code above would look like:
This is an example inline link in which the link would point to ‘http://example.com/’
Place the text to be linked inside square brackets, then the URL in regular brackets straight afterwards.
An annual report should be linked as below.
See the Department of Hurrah 2012 Annual Report for more information about this data.